Introduction to String Art
String art is a captivating craft that combines mathematics, geometry, and creativity to create stunning visual artworks. If you're wondering how to do string art, you're in the right place. This comprehensive guide will walk you through every step of the process, from gathering materials to hanging your finished masterpiece on the wall.
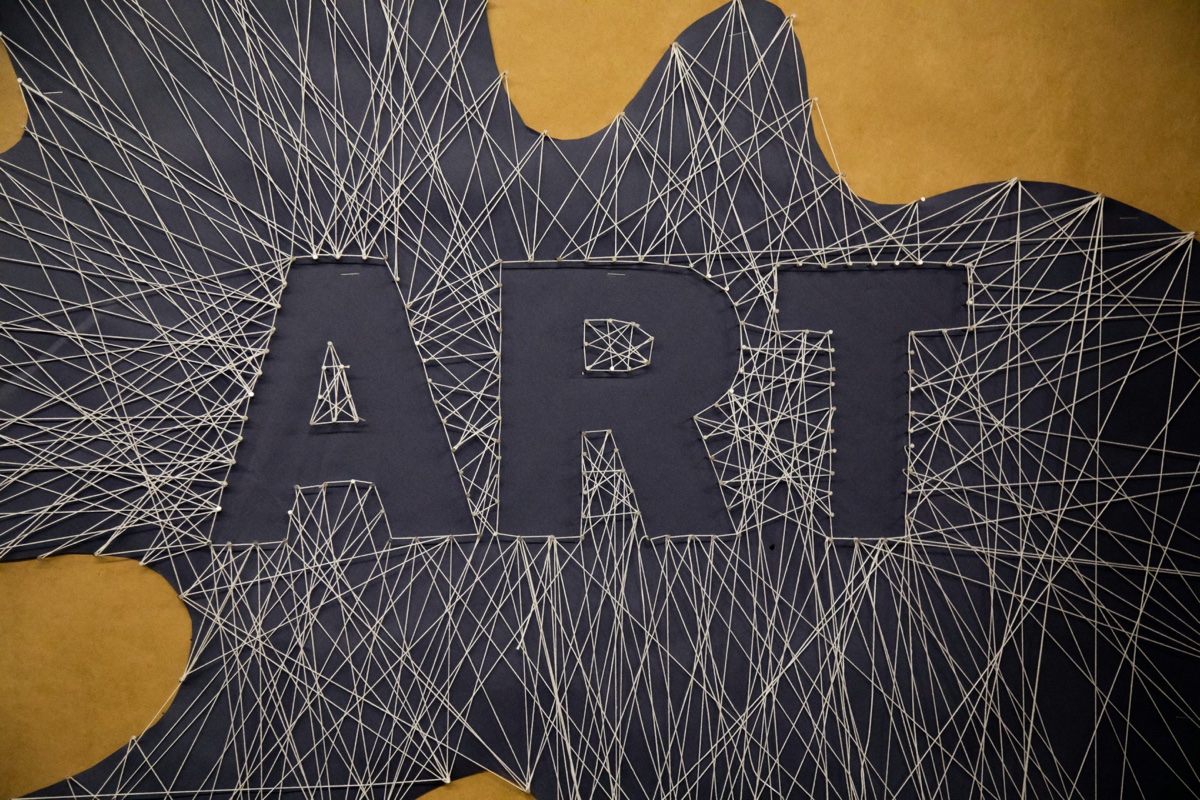
String art works by wrapping thread or string around pins arranged in a specific pattern, typically on a wooden board. When done correctly, the overlapping lines create darker areas that form recognizable images—from simple geometric shapes to complex portraits. The beauty of string art lies in its mathematical precision combined with artistic expression.
Whether you're a complete beginner or looking to refine your technique, this tutorial will give you all the knowledge you need to create beautiful string art pieces. Let's dive in!
What You'll Need
Before learning how to do string art, you'll need to gather the right materials. Here's a complete list of everything required for your first project:
Essential Materials
- Wooden Board: A circular or square piece of plywood, MDF, or solid wood (12-24 inches is ideal for beginners)
- Pins or Small Nails: 1-inch wire nails, panel pins, or specialized string art pins (200-400 pins depending on design complexity)
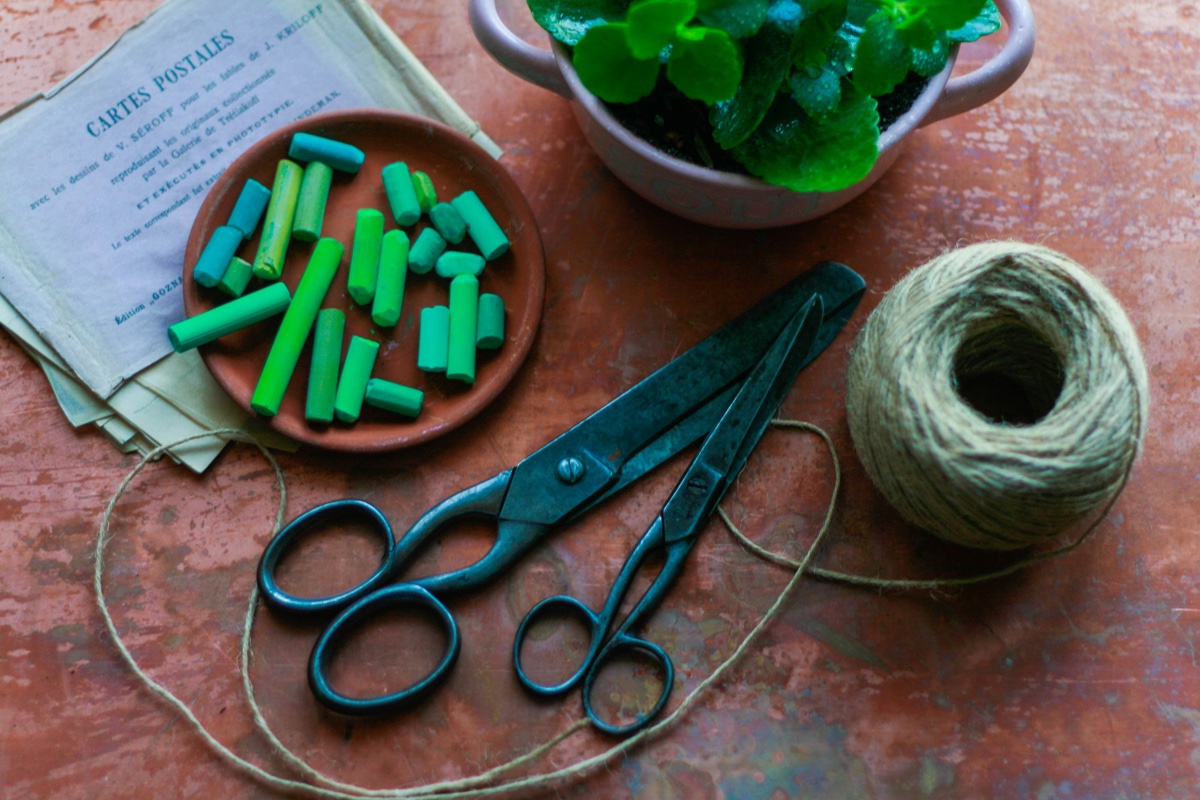
- String or Thread: Embroidery floss, crochet thread, or thin craft string in your chosen color
- Hammer: A small tack hammer or regular hammer for securing pins
- Pattern or Design: Either hand-drawn, printed, or generated using our String Art Generator tool
- Pencil: For marking pin positions
- Ruler or Compass: To ensure accurate pin spacing
Optional but Recommended
- Paint or Stain: To finish your wooden board before adding string
- Sandpaper: For smoothing the board surface
- Masking Tape: To secure your pattern template
- Scissors: For cutting thread
- Pliers: Helpful for pulling out mis-placed pins
💡 Pro Tip: Choosing the Right Board
For your first string art project, choose a circular board as it's easier to work with than rectangular shapes. A 16-inch circular piece of 1/2-inch plywood is perfect for beginners and widely available at craft stores.
Step 1: Prepare Your Board
The foundation of great string art is a well-prepared board. Here's how to get your surface ready:
Sand the Surface
Start by sanding your wooden board with medium-grit sandpaper (120-150 grit) to create a smooth surface. Pay special attention to the edges, removing any splinters or rough spots. Wipe away all dust with a damp cloth and let it dry completely.
Paint or Stain (Optional)
While not required, painting or staining your board creates a more professional finish. Dark colors (black, navy, dark gray) provide excellent contrast for light-colored string, while white or light backgrounds work beautifully with dark thread. Apply 2-3 thin coats, allowing each to dry thoroughly.
Seal the Surface
After painting, apply a clear sealant to protect the finish. This also makes the surface smoother for working with string and helps prevent the wood from warping over time.
⚠️ Important Safety Note
Always work in a well-ventilated area when using paints, stains, or sealants. Wear appropriate safety equipment and follow manufacturer instructions for drying times.
Step 2: Mark Pin Positions
Accurate pin placement is crucial for creating clean, professional-looking string art. Here's the best approach:
For Circular Designs
Most string art uses a circular arrangement of pins. The number of pins determines the detail level—more pins allow for finer detail, while fewer pins create a more geometric, stylized look. For beginners, aim for 200-288 pins evenly spaced around your circle.
To mark pin positions on a circular board:
- Find the center of your board and mark it lightly with pencil
- Use a compass to draw a circle about 1 inch smaller than the board edge
- Calculate the spacing: divide 360° by the number of pins you want (e.g., 360° ÷ 288 = 1.25° apart)
- Mark each pin position around the circle with a small dot
Using a Template
The easier method is to use our String Art Generator to create a precise template. Simply upload your image, select your settings, and the tool will generate a pattern showing exactly where each pin should go. Print this template and use tape to secure it to your prepared board.
💡 Pro Tip: Pattern Transfer
If using a printed template, you can mark pin positions by pushing a pin through the paper at each dot. This creates small indentations in the wood that guide your hammer work. Remove the paper before hammering pins fully.
Step 3: Hammer in Pins
With your positions marked, it's time to add the pins. This step requires patience and precision:
Pin Depth Consistency
The key to professional string art is ensuring all pins are hammered to the same depth—typically about 1/2 to 3/4 inch deep. Here's how:
- Start by hammering one pin to your desired depth
- Use this as a visual reference for all other pins
- Tap each pin gently until it's flush with your reference pin
- Keep pins perfectly vertical—not angled
Working Around the Circle
Rather than hammering pins randomly, work systematically around your circle. This helps maintain even spacing and allows you to check your work as you go. If you notice any pins that are crooked or at the wrong depth, use pliers to remove them and try again.
💡 Pro Tip: Depth Guide
Wrap a piece of tape around your nails at the 1/2-inch mark. Hammer until the tape touches the board for perfectly consistent depth every time. This simple trick saves hours of frustration!
Step 4: Plan Your Design
Before you start wrapping string, you need a clear plan for which pins to connect and in what order. This is where understanding how to do string art becomes more artistic:
Understanding Line Sequences
String art creates images through the density of overlapping lines. Areas where many lines cross appear darker, while areas with fewer lines remain lighter. The "line sequence" is the specific order in which you connect pins.
Manual vs. Algorithmic Design
You have two options for planning your design:
- Manual Design: Choose pins by eye, connecting those that best match your image's dark areas. This requires artistic judgment but offers creative freedom.
- Algorithmic Design: Use our String Art Generator to automatically calculate the optimal line sequence. The algorithm determines exactly which pins to connect and in what order for the most accurate image reproduction.
For beginners, we strongly recommend using the algorithmic approach. It eliminates guesswork and produces professional results on your first try.
Step 5: String Your Pattern
Now comes the most satisfying part—actually creating your string art! Here's the proper technique:
Starting Your String
- Tie your string securely to your starting pin with a double knot
- Trim excess thread close to the knot
- Wrap the string around the pin 2-3 times to secure it
Following the Line Sequence
If using a generated pattern, you'll have a list telling you which pin to connect next. For example: Pin 0 → Pin 145 → Pin 67 → Pin 203, etc. Follow this sequence exactly:
- Pull the string taut (but not too tight) to the next pin in your sequence
- Wrap around that pin once, keeping tension consistent
- Move to the next pin without cutting the string
- Continue until you've completed all lines in your sequence
Maintaining Tension
Consistent tension is crucial. Too loose and your image will be blurry; too tight and you risk bending pins or warping your board. The string should be taut enough that it doesn't sag, but not so tight that it pulls the pins.
Finishing Your String
When you reach the end of your sequence (or run out of thread):
- Wrap the string around the final pin 2-3 times
- Tie it off with a secure double knot
- Trim excess thread close to the knot
- If continuing with a new thread, start at a pin that already has string to hide the knot
💡 Pro Tip: Thread Management
Wind your thread onto a shuttle or piece of cardboard before starting. This prevents tangling and makes it much easier to work around the pins. Pre-cut your thread into 10-15 foot lengths for better control.
Expert Tips for Success
After creating dozens of string art pieces, here are our top tips for achieving professional results:
1. Start Simple
Your first project should be a simple design—a silhouette, geometric shape, or basic portrait. As you master the technique of how to do string art, you can progress to more complex images with gradients and fine details.
2. Choose High-Contrast Images
Images with strong contrast between light and dark areas translate best to string art. Portraits with clear shadows, bold graphics, and silhouettes work particularly well. Avoid busy backgrounds or images with lots of mid-tones.
3. Use Quality Materials
While it's tempting to use the cheapest supplies, quality materials make a significant difference. Professional embroidery thread creates cleaner lines than cheap craft string, and properly treated wood won't warp over time.
4. Work in Good Lighting
String art requires precision, so work in a well-lit area where you can clearly see your pins and string. Natural daylight or bright LED lighting works best.
5. Take Breaks
String art is meditative but can cause hand fatigue. Take regular breaks to rest your hands and step back to view your progress from a distance. This also helps you spot any mistakes before they become major issues.
6. Document Your Work
Take photos as you progress, especially if you're creating your own sequence. This helps you remember your technique for future projects and creates satisfying before/after comparisons.
Common Mistakes to Avoid
Learning how to do string art involves avoiding these frequent pitfalls:
Uneven Pin Depth
This is the #1 beginner mistake. Pins at different heights create an uneven surface that makes stringing difficult and results in a messy final appearance. Use the tape trick mentioned earlier to maintain consistency.
Inconsistent Tension
Varying tension creates visible differences in line darkness. Practice maintaining the same pull on every line. Your hands will develop muscle memory for the correct tension after a few hundred lines.
Wrong String Choice
Using string that's too thick creates a chunky, amateur look. Stick with embroidery floss or thin crochet thread for the cleanest results. See our guide on choosing the best string for string art for detailed recommendations.
Skipping the Template
Trying to "eyeball" pin placement leads to uneven spacing and poor results. Always use a template or measuring tool to mark pin positions accurately.
Not Planning the Sequence
Random stringing rarely produces good results. Either follow a carefully planned sequence or use an algorithmic generator to determine the optimal line order.
Pulling Too Tight
Over-tightening can bend pins, warp your board, or even snap the string. The goal is taut, not tense. If you see your board starting to bow, your tension is too high.
Frequently Asked Questions
How long does it take to do string art?
A simple string art project with 200 pins and 1,000 lines takes about 2-3 hours for beginners once the board is prepared. Complex portraits with 400 pins and 4,000+ lines can take 8-12 hours. With practice, you'll work faster. The board preparation (sanding, painting) adds 2-4 hours plus drying time.
Can you do string art without nails?
Yes! Alternative methods include using push pins on cork or foam boards, or drilling small holes and threading string through them. However, traditional nails provide the most secure and professional results.
What's the best wood for string art?
Plywood (1/2-inch thick) is ideal for beginners—it's affordable, stable, and holds nails well. MDF is also excellent and has a very smooth surface. Avoid thin wood (under 1/4 inch) as it may split when hammering pins, and avoid very hard woods like oak which are difficult to nail into.
How many pins do I need for string art?
The number depends on your design complexity and board size. For a 12-16 inch circular board, use 200-288 pins for moderate detail, or 324-400 pins for fine detail. More pins allow for smoother curves and finer features, but also increase project time. Start with 250-300 pins for your first project.
Can I reuse a string art board?
Yes, you can carefully cut and remove the string, then pull out the pins. Sand the board lightly to remove pin holes (or fill them with wood putty), then repaint and start fresh. However, extensive pin holes may weaken the board over time.
How do I hang string art on the wall?
The easiest method is to attach a sawtooth hanger to the back of your board before starting your project. Alternatively, use heavy-duty picture hanging strips or attach a wire between two eye hooks on the back. Make sure your hanging hardware is rated for the weight of your finished piece.
What's the difference between string art and thread art?
These terms are often used interchangeably. Technically, "thread art" specifically refers to using embroidery thread or fine threads, while "string art" can include any stringed material. The techniques are identical regardless of which term you use.
Conclusion
Learning how to do string art opens up a world of creative possibilities. By following this comprehensive guide—from preparing your board to stringing your final line—you now have all the knowledge needed to create stunning string art pieces.
Remember, the key to success is patience, precision, and practice. Your first project might not be perfect, and that's okay! Each piece teaches you something new about tension, pin placement, and design. The mathematical beauty of string art lies in its forgiving nature—small imperfections often blend into the overall image.
Ready to create your first string art masterpiece? Take the guesswork out of design and pattern creation with our String Art Generator. Upload your photo, customize your settings, and get a complete pattern with pin positions and line sequences in minutes. It's the perfect tool for both beginners learning how to do string art and experienced artists looking to streamline their workflow.
Ready to Create Your String Art?
Transform any photo into a professional string art pattern in minutes
Try Free Generator →