Introduction to Pattern Creation
Creating the perfect pattern is the foundation of successful string art. Whether you're a beginner or experienced crafter, understanding how to make string art patterns transforms your creative vision into a precise roadmap for stunning results. A well-designed pattern determines pin placement, line sequences, and ultimately, the quality of your finished piece.
The pattern creation process involves more than just selecting an image—it requires understanding contrast, complexity, and the mathematical principles that make string art work. Modern digital tools have revolutionized this process, making it possible to create professional-quality patterns in minutes rather than hours of manual calculation.
In this comprehensive guide, you'll learn both traditional and modern approaches to pattern creation, discover what makes a great string art design, and master the tools that streamline the entire process.
Understanding String Art Patterns
Before diving into how to make string art patterns, it's essential to understand what makes an effective design. String art creates images through the density of overlapping lines—the fundamental principle that guides all pattern creation.
The Science Behind Patterns
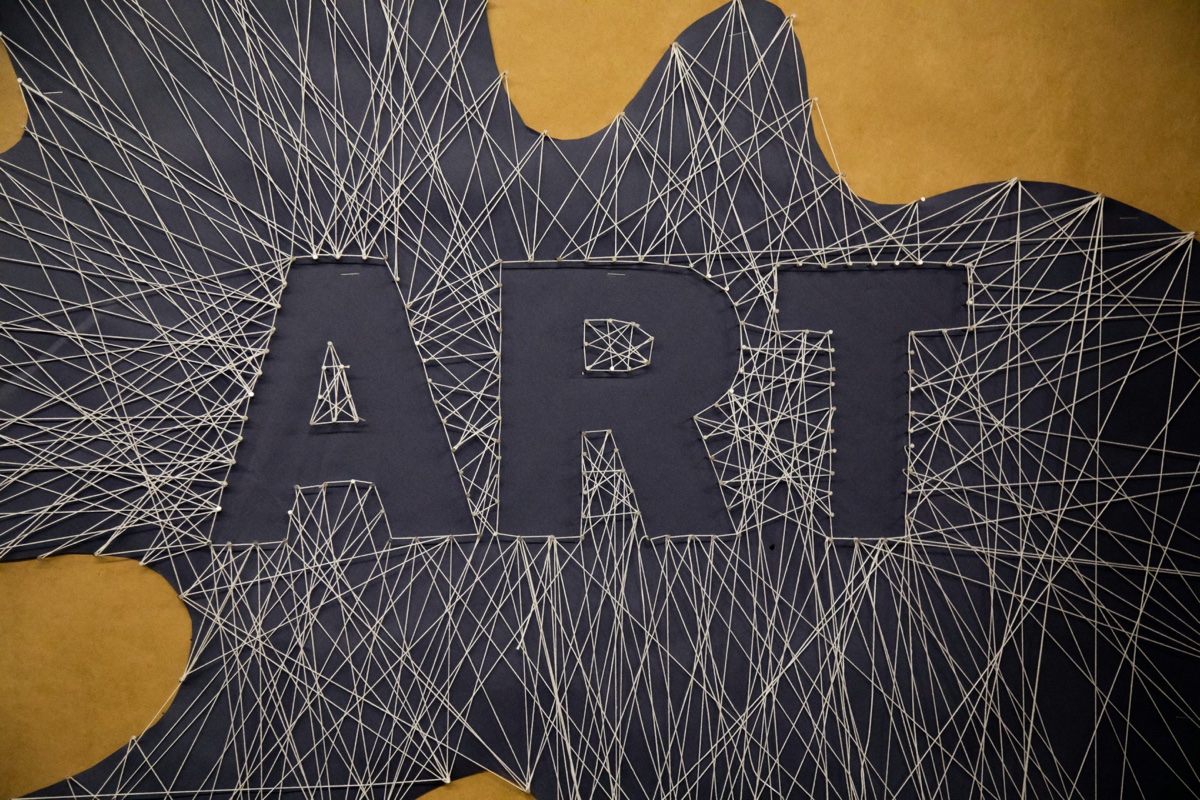
String art patterns work through a simple but powerful concept: where many lines intersect, the image appears darker; where few lines cross, it remains lighter. This creates gradients and shading that our eyes interpret as a recognizable image. The pattern determines which pins to connect and in what order to achieve this effect.
Key Elements of Good Patterns
Effective string art patterns share several critical characteristics:
- High Contrast: Clear distinction between dark and light areas ensures the image reads clearly
- Appropriate Detail Level: Balanced complexity that matches your pin count and skill level
- Clean Edges: Sharp boundaries create recognizable shapes and features
- Strategic Line Distribution: Optimal placement of lines to maximize image clarity
- Scalability: Patterns that work well at your intended board size
💡 Pro Tip: Pattern Resolution
The number of pins in your pattern acts like pixel resolution in digital images. More pins (300-400) allow for finer detail and smoother gradients, while fewer pins (200-250) create a more geometric, stylized look. Choose based on your design goals and patience level.
Choosing the Right Image
Selecting the right source image is perhaps the most crucial step in learning how to make string art patterns. Not all images translate well to string art, and understanding what works—and what doesn't—saves hours of frustration.
Contrast is King
High-contrast images are the cornerstone of successful string art patterns. Look for images with:
- Deep Blacks and Bright Whites: Strong tonal range provides clear areas to fill with string
- Minimal Mid-Tones: Too many gray areas create muddy, unclear results
- Defined Shadows: Bold shadow areas guide line placement naturally
- Clear Subject Separation: The main subject should stand out distinctly from the background
Complexity Considerations
When evaluating image complexity for patterns, consider these factors:
Ideal Subject Matter
- Portraits: Side profiles and front-facing faces with strong lighting work exceptionally well
- Silhouettes: Simple shapes with clean edges are perfect for beginners
- Animals: Choose images with distinctive features and clear outlines
- Logos and Graphics: Bold, graphic designs translate beautifully to string art
- Landscapes: Simplified landscapes with strong foreground elements (advanced)
Avoid These Image Types
- Busy backgrounds with competing elements
- Low-contrast photos with flat lighting
- Images with fine text or intricate patterns
- Overly complex scenes with multiple focal points
- Photos with important details in mid-tone ranges
⚠️ Image Quality Matters
Use high-resolution images (at least 1000x1000 pixels) as your source. Low-resolution or blurry images produce patterns with unclear features that won't improve when rendered in string. Always start with the best possible source material.
Testing Before Committing
Before creating your final pattern, convert your chosen image to black and white and increase the contrast dramatically. If the image still looks recognizable and appealing in this extreme state, it will work well for string art.
Using Digital Tools
Modern digital tools have revolutionized how to make string art patterns, transforming what was once a complex mathematical challenge into a streamlined, accessible process. The String Art Generator represents the cutting edge of this technology.
Why Use the String Art Generator
Creating patterns manually requires calculating thousands of potential line combinations to determine which create the best representation of your image. The String Art Generator uses advanced algorithms to perform these calculations instantly, analyzing your image and generating optimal patterns in minutes.
Step-by-Step Generator Walkthrough
Here's how to use the String Art Generator to create professional patterns:
Step 1: Upload Your Image
Navigate to the String Art Generator and click the upload area. Select your high-contrast image from your device. The tool accepts JPG, PNG, and other common image formats. Upon upload, you'll see a preview of your image displayed in the interface.
Step 2: Adjust Image Settings
The generator provides several image adjustment tools to optimize your pattern:
- Crop Tool: Frame your subject perfectly by removing unnecessary background elements. Click and drag to select the area you want to keep.
- Brightness/Contrast Sliders: Fine-tune the tonal range to emphasize important features. Increase contrast to make features more prominent.
- Invert Option: Swap dark and light areas if your source image is a negative or you want to reverse the effect.
💡 Pro Tip: Preview Before Processing
Use the real-time preview to see how adjustments affect your pattern. The preview shows approximately how the final string art will render, helping you make informed decisions about contrast and cropping before generating the full pattern.
Step 3: Configure Pattern Settings
The generator offers customizable settings to match your project requirements:
- Number of Pins (200-400): More pins create finer detail but increase project complexity. Start with 250-300 for balanced results.
- Number of Lines (1000-5000): More lines create darker, more detailed images. 2000-3000 lines work well for most portraits.
- Line Opacity: Adjusts how much each line contributes to the overall darkness. Lower opacity requires more lines for the same effect.
- Min/Max Line Length: Controls which pin connections are allowed. Restricting very short connections can improve image clarity in some cases.
Step 4: Generate Your Pattern
Click the "Generate Pattern" button and watch the algorithm work in real-time. The generator will:
- Convert your image to a format optimized for string art analysis
- Calculate the optimal starting pin position
- Iteratively select each subsequent line that best matches your source image
- Build a complete pattern showing the accumulation of lines over time
This process typically takes 30-90 seconds depending on your settings. You'll see a progress indicator and real-time preview as the pattern generates.
Step 5: Review and Download
Once generation completes, the tool provides several outputs:
- Visual Preview: See exactly how your finished string art will look
- Pin Template: A printable guide showing precise pin positions to tape to your board
- Line Sequence: A numbered list telling you exactly which pins to connect in order
- Statistics: Details about total lines used, starting pin, and estimated completion time
Advanced Generator Features
Power users can take advantage of additional features:
- Multiple Iterations: Generate several pattern variations with different settings to compare results
- Color Customization: Preview your pattern with different string and background color combinations
- Export Options: Download patterns in various formats suitable for printing or digital reference
- Pattern Sharing: Save and share your favorite configurations for future projects
💡 Pro Tip: Save Your Settings
When you find settings that work well for a particular image type (portraits, logos, etc.), take note of the values. These settings often work well for similar images, giving you a starting point for future projects.
Manual Pattern Creation
While digital tools streamline the process, understanding traditional manual methods deepens your appreciation of how to make string art patterns and enables you to create patterns when digital tools aren't available.
The Traditional Approach
Manual pattern creation involves several methodical steps:
1. Create a Template
Start by printing or drawing your image at the exact size of your board. Convert it to high-contrast black and white using photo editing software or by adjusting printer settings. This template becomes your guide for the entire process.
2. Establish Pin Layout
Decide on your total pin count and mark their positions around your circle or shape perimeter. Use a protractor to ensure even spacing—for 288 pins on a circle, each pin sits 1.25 degrees apart. Number each pin position on your template.
3. Plan the First Line
Study your image and identify the darkest, most important feature. Your first line should cross through a critical dark area. Place a straightedge between two pins that creates a line through this area and lightly mark these pin numbers.
4. Build the Sequence
Continue selecting lines one at a time, each time choosing the connection that:
- Passes through the darkest remaining areas
- Doesn't create too much overlap where the image should be light
- Balances overall line distribution around the circle
- Creates the best approximation of your source image
This process is extremely time-intensive—manually planning even 500 lines can take several hours. Document each line number in sequence as you go.
Using Physical Templates
Some crafters prefer creating physical templates with the actual string. This technique involves:
- Setting up a practice board with pins in the correct positions
- Using white string on a dark board (or vice versa) to experiment with line placement
- Photographing successful patterns from directly above
- Documenting the sequence for reproduction on the final board
While this method provides hands-on control, it's incredibly time-consuming and difficult to iterate. Most modern crafters prefer using the String Art Generator to skip this tedious process while still achieving professional results.
⚠️ Manual Pattern Limitations
Manual pattern creation is impractical for complex images with thousands of lines. The human eye cannot accurately predict how thousands of line intersections will combine to form an image. This is why algorithmic generators produce superior results for detailed portraits and complex designs.
Pattern Complexity Levels
Understanding pattern complexity helps you choose appropriate projects as you learn how to make string art patterns. Start simple and progress to more challenging designs as your skills develop.
Simple Patterns (Beginner Level)
Perfect for your first 1-3 projects:
- Pin Count: 200-250 pins
- Line Count: 800-1500 lines
- Ideal Subjects: Bold silhouettes, simple geometric shapes, single-color logos
- Time Commitment: 2-4 hours of stringing
- Characteristics: High contrast, clean edges, minimal shading, easily recognizable shapes
Example Simple Patterns
- Heart or star silhouettes
- Simple animal outlines (cat, bird, deer)
- Geometric designs and mandalas
- Bold initial letters or monograms
- Basic landscape silhouettes (mountains, trees)
💡 Pro Tip: Start with Profiles
For your first portrait, choose a side profile rather than a front-facing image. Profiles have clearer, simpler shapes and are more forgiving of small mistakes in pattern execution.
Intermediate Patterns (Developing Skills)
Once you've completed 3-5 simple projects:
- Pin Count: 250-350 pins
- Line Count: 1500-3000 lines
- Ideal Subjects: Portraits with moderate detail, animals with features, objects with shading
- Time Commitment: 4-8 hours of stringing
- Characteristics: Some gradient areas, multiple features, moderate complexity
Example Intermediate Patterns
- Front-facing portraits with clear features
- Animals with textural details (fur, feathers)
- Vehicles or mechanical objects
- Architectural subjects with strong lines
- Flowers or natural objects with detail
Advanced Patterns (Experienced Crafters)
For those with 10+ completed projects:
- Pin Count: 350-400+ pins
- Line Count: 3000-5000+ lines
- Ideal Subjects: Highly detailed portraits, complex scenes, photorealistic images
- Time Commitment: 8-15+ hours of stringing
- Characteristics: Subtle gradients, fine details, multiple focal points, challenging execution
Example Advanced Patterns
- Photorealistic portraits with subtle shading
- Complex wildlife images with environmental context
- Multi-subject compositions
- Detailed landscape scenes
- Artistic interpretations with intentional effects
Testing Your Pattern
Before committing hours to stringing a full project, testing your pattern saves time and materials. Here's how to validate your pattern before starting:
Digital Preview Testing
The String Art Generator provides instant visual previews showing exactly how your pattern will look when completed. Use this to:
- Verify Image Recognition: Ensure the subject is clearly identifiable in the preview
- Check Feature Definition: Confirm important details (eyes, nose, distinctive features) are visible
- Evaluate Overall Balance: Ensure the image isn't too dark or too light
- Test Different Settings: Generate multiple variations with different pin and line counts to compare
Small-Scale Physical Testing
For particularly complex or important projects, create a small test version:
- Create a miniature board (6-8 inches) with proportionally fewer pins
- Use a scaled-down version of your pattern (the generator can export at different sizes)
- String the first 25-30% of the pattern to see how it develops
- Evaluate the results and adjust settings if needed
Partial Pattern Testing
When working on your full-size board, you can test the pattern by:
- Stringing the first 500-1000 lines, then stepping back to evaluate
- Using removable thread for the test (painter's tape can mark your progress if you need to restart)
- Taking photos from various distances to see how the image reads
- Comparing progress photos to the generator's preview
💡 Pro Tip: The View Test
String art often looks clearer from a distance than up close. After stringing 30-40% of your pattern, step back 6-10 feet and take a photo with your phone. This perspective reveals how the final piece will appear on a wall and helps identify issues early.
Adjusting and Refining Patterns
Even well-planned patterns sometimes need refinement. Understanding how to make string art patterns includes knowing when and how to optimize your designs.
Common Pattern Issues and Solutions
Issue: Image Too Dark Overall
Solutions:
- Reduce the total number of lines in your pattern
- Decrease line opacity settings in the generator
- Increase the minimum line length to prevent excessive short lines in concentrated areas
- Consider using lighter-colored thread against your background
Issue: Important Features Not Visible
Solutions:
- Increase contrast in your source image before generating the pattern
- Crop tighter to emphasize the subject and eliminate distracting elements
- Increase pin count to allow for finer detail
- Manually enhance critical areas in your source image before pattern generation
Issue: Pattern Looks Muddy or Unclear
Solutions:
- Increase contrast dramatically in the source image
- Simplify the image by removing mid-tones (convert to pure black and white)
- Choose a different source image with clearer features
- Reduce background complexity in the original image
Issue: Edges Are Fuzzy or Imprecise
Solutions:
- Sharpen your source image before pattern generation
- Increase the number of pins for more precise line placement
- Adjust the minimum line length to allow more lines near edges
- Manually edit your source image to strengthen edge definition
Optimization Techniques
Pre-Processing Your Image
Before generating patterns, optimize your source image using photo editing software:
- Convert to Grayscale: Remove color to see how contrast translates
- Adjust Levels: Push blacks darker and whites brighter
- Apply Unsharp Mask: Enhance edge definition
- Remove Noise: Clean up grainy areas that won't translate well
- Dodge and Burn: Manually lighten or darken specific areas to improve feature visibility
Iterative Refinement
Don't expect perfection on the first try. Professional pattern makers often:
- Generate an initial pattern with conservative settings
- Review the results and identify specific issues
- Adjust source image or generator settings to address those issues
- Generate a new pattern and compare to the previous version
- Repeat until achieving optimal results
The String Art Generator makes this iteration process fast and easy, allowing you to test multiple variations in minutes rather than hours.
⚠️ Know When to Start Over
Sometimes the source image simply won't work well for string art, no matter how much you adjust the pattern. If you've tried 3-4 variations without success, consider choosing a different image with stronger contrast and clearer features. Starting with the right image saves more time than trying to fix a fundamentally unsuitable one.
Advanced Refinement: Manual Adjustments
For critical projects, you can manually refine generated patterns by:
- Identifying lines that detract from image clarity in the preview
- Editing the line sequence file to remove or reorder specific lines
- Adding extra lines in areas that need more definition
- Adjusting line order to improve the pattern's visual development
This advanced technique requires understanding the line sequence format but provides maximum control over the final result.
Frequently Asked Questions
How do you make string art patterns for beginners?
Beginners should start with high-contrast silhouettes and use the String Art Generator to create patterns automatically. Choose simple subjects (hearts, animals in profile, basic shapes), use 200-250 pins, and keep line counts between 800-1500. The generator handles all complex calculations, providing a clear template and line sequence to follow. This approach eliminates the mathematical complexity while teaching fundamental techniques.
What's the best software for making string art patterns?
The String Art Generator is specifically designed for creating string art patterns, offering real-time previews, customizable settings, and downloadable templates. Unlike general image editing software, it calculates optimal line sequences using algorithms specifically developed for string art. Other options include Python-based string art libraries for programmers, but these require coding knowledge and lack user-friendly interfaces.
How many pins do I need for different pattern complexities?
Simple patterns work well with 200-250 pins, intermediate patterns benefit from 250-350 pins, and advanced detailed work requires 350-400+ pins. More pins allow for finer details and smoother curves but increase both project time and complexity. For your first project, start with 250 pins—enough for good detail without being overwhelming. You can always increase pin count as your skills develop.
Can I create patterns from any photo?
Not all photos work well for string art patterns. The best images have high contrast, clear subject definition, simple backgrounds, and distinctive features. Avoid low-contrast photos, busy backgrounds, images with important mid-tone details, or overly complex scenes. Before creating a pattern, convert your photo to high-contrast black and white—if it still looks good, it will work for string art.
How long does it take to create a string art pattern?
Using the String Art Generator, creating a complete pattern takes 30-90 seconds after uploading your image. Manual pattern creation can take several hours or even days for complex designs, as you must calculate thousands of line intersections by hand. The generator's algorithmic approach produces superior results in a fraction of the time, making pattern creation accessible to everyone.
What image resolution do I need for good patterns?
Use source images of at least 1000x1000 pixels, though 1500x1500 or higher is ideal for detailed work. Higher resolution provides more information for the pattern generator to analyze, resulting in more accurate patterns. Low-resolution images (below 500 pixels) produce fuzzy, unclear patterns. Always start with the highest quality image available for best results.
How do I fix a pattern that looks too dark?
If your pattern preview appears too dark, reduce the total number of lines, decrease line opacity in the generator settings, or increase the minimum line length parameter. Alternatively, you can use lighter-colored thread or string fewer lines than the pattern specifies (string 60-70% of the total lines for a lighter effect). Always test patterns digitally before committing to the physical project.
Conclusion
Mastering how to make string art patterns is the gateway to creating stunning, professional-quality string art. By understanding the principles of contrast, complexity, and line distribution, you can transform virtually any image into a workable pattern. Whether you choose traditional manual methods or leverage modern digital tools, the pattern creation process is where your artistic vision takes concrete form.
The key to success lies in starting with the right image—one with high contrast, clear features, and appropriate complexity for your skill level. From there, digital tools like the String Art Generator eliminate hours of mathematical calculation, providing precise patterns that ensure successful results even on your first attempt.
Remember that pattern creation is an iterative process. Don't hesitate to generate multiple variations, test different settings, and refine your approach until you achieve the perfect pattern. Each project teaches you more about what works, building your intuition for selecting and optimizing images for string art.
Ready to create your first string art pattern? Visit the String Art Generator and transform your photos into professional patterns in minutes. Upload your image, adjust the settings to match your vision, and download a complete pattern package with pin templates and line sequences. Whether you're creating your first piece or your hundredth, the generator streamlines the pattern creation process so you can focus on the joy of crafting.
Create Your Perfect String Art Pattern
Transform any image into a professional string art pattern with pin-point accuracy
Start Pattern Generator →


