Why String Art is Perfect for Beginners
If you're looking for a creative hobby that combines art, math, and meditation, string art for beginners is an ideal starting point. Unlike many crafts that require years of practice to see results, string art delivers impressive, frame-worthy pieces even on your first attempt. The beauty lies in its forgiving nature—small imperfections blend into the overall design, making it nearly impossible to "mess up."
String art appeals to beginners because it requires minimal supplies, fits any budget, and produces tangible results in just a few hours. Whether you're a complete craft novice or someone looking to try something new, string art offers instant gratification with room for endless growth and complexity as your skills develop.
This guide focuses on creating one simple, beautiful heart-shaped string art project. By the end, you'll have a completed piece to display proudly and the confidence to tackle more ambitious designs. Let's get started on your string art journey!
Essential Supplies Checklist
One of the best things about string art for beginners is that you need very few supplies to get started. Here's your minimal starter kit:
Absolute Essentials
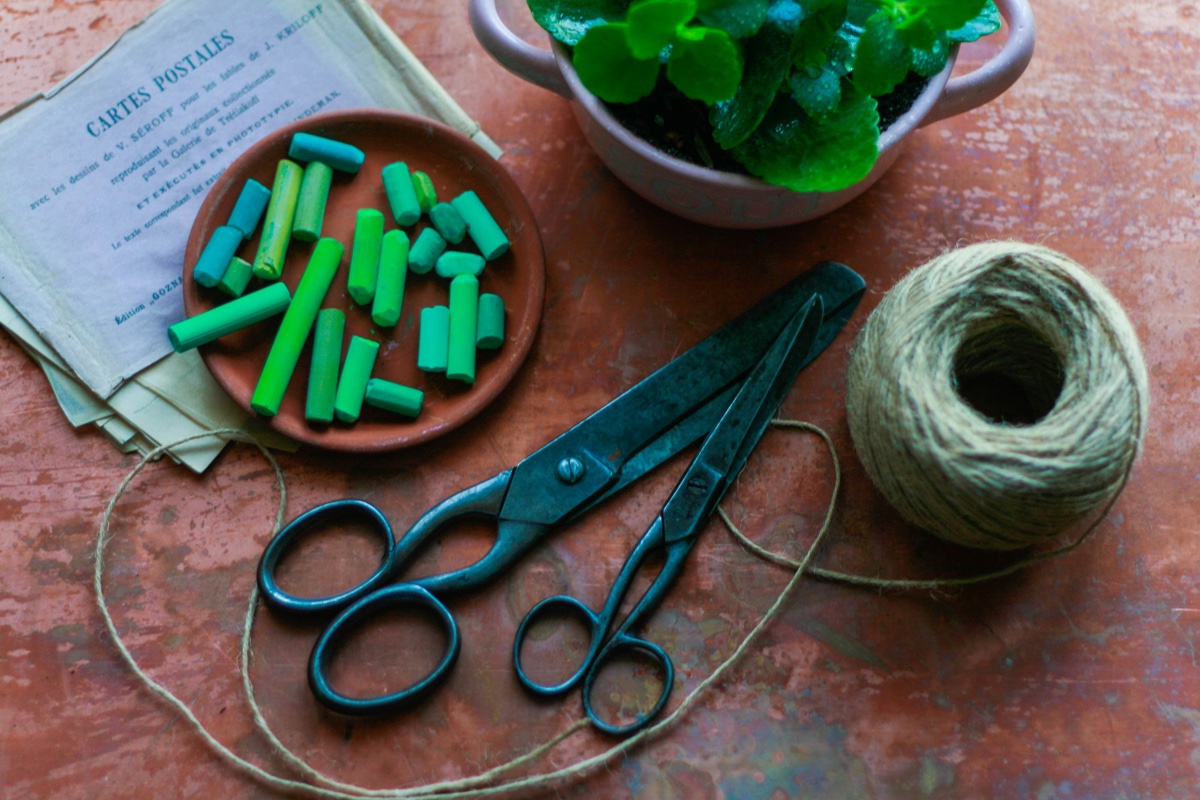
- Wooden Board: A 12x12 inch square piece of plywood or MDF (available at craft stores for under $10)
- Small Nails: 1-inch wire nails or panel pins, about 60-80 pieces for a heart design
- String or Thread: One skein of embroidery floss in your chosen color (black, white, or red work beautifully for hearts)
- Hammer: Any small hammer you already own
- Printed Pattern: A simple heart template (we'll show you how to get one free)
- Pencil: For marking positions
- Scissors: For cutting thread
Nice to Have (But Not Required)
- Sandpaper: To smooth rough board edges
- Paint: Black or white acrylic paint for the board background (optional but recommended)
- Masking Tape: To secure your pattern
- Ruler: For measuring margins
Budget Breakdown
Your first string art project can cost as little as $15-20 total if purchasing all new supplies. Most people already own the hammer, scissors, and pencil, bringing the actual cost down to about $10-12. This makes string art one of the most affordable crafts to start!
Where to Buy Supplies
All these materials are available at craft stores like Michaels, Hobby Lobby, or Joann. You can also find them at hardware stores (for wood and nails) and online. For your first project, shopping locally lets you see and feel the materials, making it easier to choose the right items.
Your First Simple Project: The Heart
For your introduction to string art for beginners, we recommend starting with a classic heart shape. Here's why the heart is the perfect first project:
Why Start with a Heart?
- Simple Shape: Hearts have smooth curves without complex details that might frustrate beginners
- Fewer Pins: A basic heart requires only 60-80 pins compared to 200+ for portraits
- Quick Completion: You can finish in 2-3 hours, perfect for maintaining enthusiasm
- Beautiful Results: Everyone loves hearts—your finished piece makes a perfect gift or decoration
- Teaches Core Skills: You'll learn all fundamental techniques needed for advanced projects
Project Specifications
Your beginner heart project will have these specifications:
- Board Size: 12x12 inches square
- Number of Pins: Approximately 70 pins around the heart outline
- String Length Needed: About 50-75 feet total (one standard embroidery floss skein)
- Time to Complete: 2-3 hours including preparation
- Difficulty Level: Beginner-friendly, perfect for ages 12+
Getting Your Free Heart Template
Use our String Art Generator to create a perfect heart template. Simply upload a simple heart image (find free ones with a quick image search), select "70 pins," and download your pattern. The generator will show you exactly where to place each pin and which pins to connect—taking all the guesswork out of your first project!
Step-by-Step Instructions
Follow these detailed steps to create your first string art masterpiece. Take your time—there's no rush!
Step 1: Prepare Your Board (15 minutes)
Start by examining your wooden board. Run your hand over the surface and edges to check for splinters or rough spots. If you find any, lightly sand them smooth with sandpaper. Wipe away all dust with a damp cloth.
Optional but recommended: Paint your board with 2 coats of black or white acrylic paint, allowing each coat to dry for 30 minutes. A painted background makes your string colors pop and creates a more professional appearance. Black backgrounds work beautifully with light-colored string, while white backgrounds showcase dark string perfectly.
Step 2: Attach Your Pattern (5 minutes)
Print your heart template at full size to fit your 12x12 inch board. Center the pattern on your board, leaving equal margins on all sides. Use small pieces of masking tape to secure all four corners so the pattern won't shift while you work.
Step 3: Mark Pin Positions (10 minutes)
Using your pencil, mark each pin position shown on your template with a small dot. Make the dots clearly visible but light enough that they won't show in your final piece. You should have approximately 70 dots forming the heart outline when finished.
Beginner tip: Remove the paper template after marking if you find it easier to see your dots. Or, keep it attached and hammer through it—both methods work fine!
Step 4: Hammer in Your Pins (30 minutes)
This is the most important step for achieving professional results. Here's how to do it right:
- Start with one pin and hammer it to about 1/2 inch deep—this is your reference pin
- Work around the heart, hammering each pin to match the depth of your reference pin
- Keep every pin perfectly vertical (not tilted)
- Space them evenly following your marked dots
- Check frequently that all pins are at the same height
Common Beginner Mistake to Avoid
Don't hammer pins all the way down or leave them too tall. Consistent depth of about 1/2 inch is crucial. Pins that are too short won't hold string well, while pins that vary in height create a messy, uneven appearance. This is the #1 issue beginners face, so pay careful attention to depth consistency!
Step 5: Plan Your Stringing Pattern (5 minutes)
If you used the String Art Generator, you'll have a numbered sequence telling you exactly which pins to connect. Review this sequence before starting. If you're creating your own pattern, decide whether you'll fill the heart solid or leave it outlined—for beginners, a filled heart is more forgiving.
Step 6: Start Stringing (60-90 minutes)
Now for the fun part! Here's how to string your heart:
- Tie Your Starting Knot: Secure your string to your first pin with a double knot, leaving a 3-inch tail
- Wrap the Pin: Loop the string around the starting pin 2-3 times for extra security
- Stretch to Next Pin: Pull the string taut (but not super tight) to your next pin in the sequence
- Wrap Once: Loop around that pin once and continue to the next
- Maintain Tension: Keep the string tight enough that it doesn't sag, but loose enough that pins don't bend
- Follow Your Sequence: Continue connecting pins according to your pattern
How to Know You're Doing It Right
As you work, your heart should gradually become visible as darker areas form where lines overlap. If you're following a generated pattern, the image will become clearer with each line. This emerging image is incredibly satisfying to watch!
Step 7: Finishing Your Piece (5 minutes)
When you reach the end of your sequence:
- Wrap your final pin 2-3 times
- Tie off with a secure double knot
- Trim excess string close to the knot
- Tuck the knot behind other strings so it's not visible from the front
- Trim your starting tail if needed
Celebration Moment!
Congratulations! You've just completed your first string art project. Take a moment to appreciate your work. Even if it's not "perfect" by your standards, you've mastered a new craft and created something beautiful with your own hands. That's genuinely impressive!
Troubleshooting Common Issues
Every beginner encounters challenges. Here are solutions to the most common problems in string art for beginners:
Problem: My Pins Are Wobbly or Bent
Cause: String tension is too tight, or the board wood is too soft.
Solution: Loosen your string tension slightly. If pins are already bent, carefully pull them out with pliers and replace them. Consider using slightly thicker nails (1.25 inches) or a harder wood board for your next project.
Problem: My String Keeps Breaking
Cause: You're pulling too tight, or the string quality is poor.
Solution: Reduce your tension—the string should be taut but not strained. Invest in quality embroidery floss rather than cheap craft string. See our guide on the best string for string art for specific recommendations.
Problem: I Can't See My Design Emerging
Cause: Not enough lines yet, or you're not following an optimal sequence.
Solution: Be patient! Designs typically become visible after 100-200 lines. If using a random pattern instead of a calculated sequence, the image may never fully appear. For your next project, use the String Art Generator to ensure proper line sequencing.
Problem: My Pins Are Different Heights
Cause: Inconsistent hammering depth.
Solution: This is hard to fix after the fact. Remove pins that are significantly off and re-hammer them. For future projects, mark your desired depth on each nail with tape before hammering, or use a guide to ensure consistency.
Problem: My Board is Bowing or Warping
Cause: String tension is way too tight.
Solution: Immediately loosen your string tension. If the board is already warped, you may need to remove strings and start over. Use 1/2-inch or thicker plywood to prevent this issue, and always maintain moderate tension.
Problem: I Made a Mistake and Connected Wrong Pins
Cause: Lost your place in the sequence or misread the pattern.
Solution: Don't worry! Small mistakes are barely noticeable in the final piece. If you catch it immediately, carefully unwind back to the error. If you've continued for many lines, just carry on—string art is remarkably forgiving, and one or two wrong connections won't ruin your project.
Problem: Running Out of String Mid-Project
Cause: Underestimated string length needed.
Solution: Tie off where you are, then start fresh string at the same or nearby pin. When tying on new string, choose a pin that already has several strings so the knot blends in invisibly.
Remember: Imperfection is Beautiful
String art thrives on slight imperfections. The overlapping lines naturally hide small mistakes, and minor variations in tension or placement often enhance rather than detract from the organic, handmade quality of your piece. Don't aim for robot-like perfection—aim for beautiful completion!
Skills You'll Develop
Creating your first string art project teaches you valuable skills that extend far beyond crafting. Here's what beginners typically learn:
Hand-Eye Coordination
Threading string from pin to pin repeatedly improves fine motor skills and coordination. This is particularly beneficial for children and older adults looking to maintain dexterity.
Patience and Focus
String art requires sustained attention for hours. Beginners quickly develop the ability to enter a meditative flow state, similar to knitting or coloring. Many people find string art therapeutic and stress-relieving.
Mathematical Thinking
Even when following a pattern, you'll develop intuition about how geometric lines create images. Understanding concepts like density, overlap, and geometric progression happens naturally as you work.
Planning and Organization
Successfully completing a string art project requires planning your materials, following sequences, and managing your workflow. These organizational skills transfer to many areas of life.
Problem-Solving
When issues arise (and they will!), you'll develop creative solutions. Learning to troubleshoot and adapt builds resilience and confidence in your abilities.
Artistic Confidence
Perhaps most importantly, completing your first piece proves to yourself that you CAN create beautiful art. This confidence often inspires beginners to explore other creative pursuits they've always wanted to try.
Next Steps and Progression
After mastering your first heart project, you're ready to level up your string art for beginners skills. Here's a natural progression path:
Project 2: Simple Circle or Star
Your second project should introduce more pins (100-150) while maintaining simple geometry. A mandala-style circular pattern or five-pointed star teaches you to work with more complex sequences while staying in your comfort zone.
New skill learned: Working with radial symmetry and higher pin counts.
Project 3: Simple Silhouette
Try a basic silhouette like a tree, bird, or mountain landscape. These designs introduce negative space—areas you DON'T fill with string—creating contrast and visual interest.
New skill learned: Using negative space effectively and creating recognizable shapes.
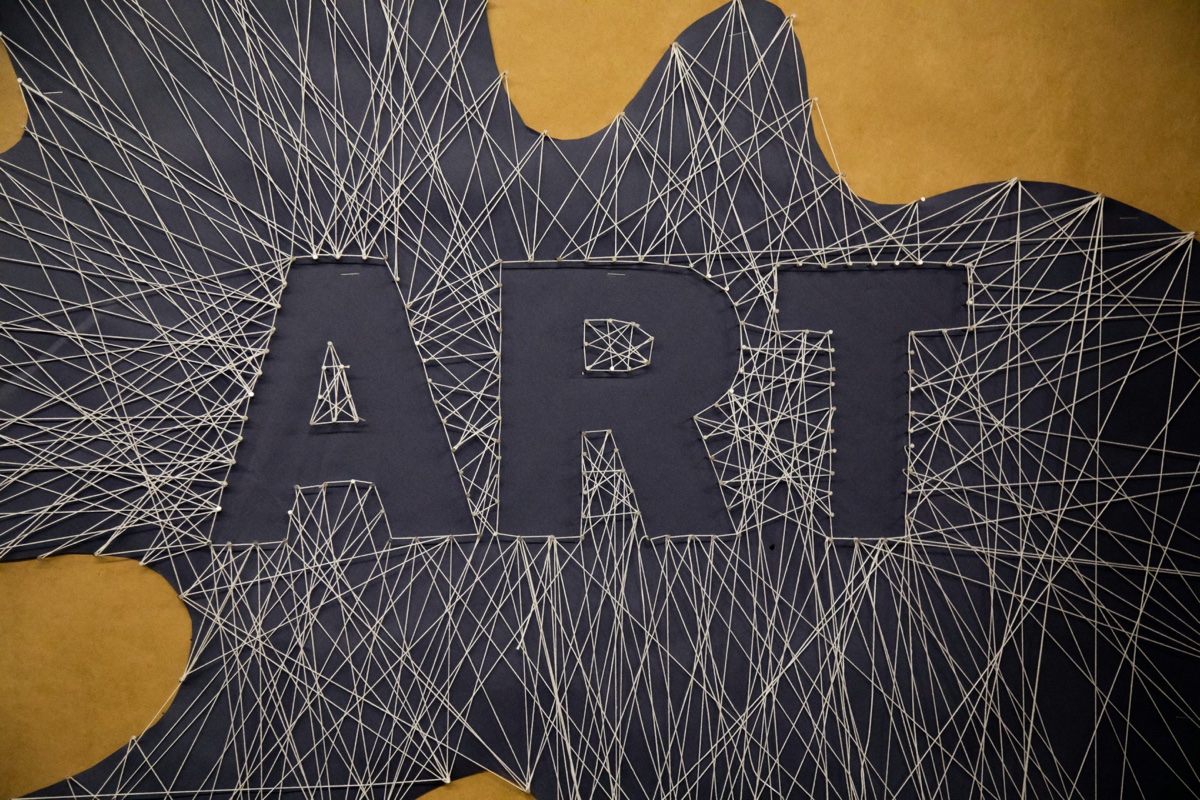
Project 4: Text or Initials
Create string art spelling out a word or someone's initials. Text projects teach precision in pin placement and introduce you to working with multiple separate sections on one board.
New skill learned: Multi-section designs and precise letter formation.
Project 5: Multi-Color Design
Use 2-3 different string colors in a single piece. This could be a colorful geometric pattern or a simple image like a sunset or rainbow.
New skill learned: Color blending, managing multiple strings, and creating depth with color.
Project 6: Simple Portrait
Once you've mastered the above, you're ready for a basic portrait—perhaps a pet or simple face with high contrast. Use the String Art Generator to create an optimized pattern with 200-300 pins.
New skill learned: Reproducing realistic images and working with gradients.
Pacing Your Progress
Don't rush! Complete 2-3 projects at each level before moving to the next. This builds muscle memory and confidence. Most beginners find they can move through levels 1-3 fairly quickly (one project per week), but levels 4-6 may take more time to master. There's no timeline—go at your own pace!
Resources for Continued Learning
As you progress, these resources will help:
- Complete guide to string art techniques
- Understanding string art theory and history
- Choosing the right materials for advanced projects
- Our String Art Generator for creating custom patterns at any complexity level
Inspiration for Future Projects
Wondering what to create after your first heart? Here are beginner-friendly ideas to inspire your next project:
Gift Ideas
- Anniversary Gift: Heart with the couple's initials or wedding date
- Birthday Present: Silhouette of the recipient's favorite animal or hobby item
- Baby Shower: Simple moon and stars or baby's name
- Housewarming: Outline of their new house or the house number
- Holiday Decor: Snowflake, Christmas tree, or star patterns
Personal Decor Projects
- Geometric mandala patterns in colors matching your room
- City skyline silhouette of your hometown
- Motivational word or phrase in simple text
- Constellation map showing the night sky on a meaningful date
- Abstract geometric designs in multiple colors
Seasonal Projects
- Spring: Butterfly, flowers, or Easter eggs
- Summer: Sun, palm tree, or beach scene
- Fall: Leaves, pumpkin, or autumn tree
- Winter: Snowflakes, trees, or winter landscapes
Pet Portrait Projects
Once you've completed 3-4 simpler projects, pet portraits are incredibly rewarding. Choose a photo with strong contrast and use the String Art Generator to create a pattern. Pet portraits make meaningful gifts and beautiful home decor celebrating your furry friends.
Project Idea: Create a Series
Consider creating 3-4 smaller pieces (8x8 inches) that hang together as a set. This could be family member portraits, the four seasons, moon phases, or a color gradient series. Series projects look incredibly impressive while letting you practice the same technique multiple times!
Frequently Asked Questions
Is string art hard for beginners?
No! String art for beginners is surprisingly easy and forgiving. Unlike painting or drawing, you don't need artistic talent—just patience and the ability to follow a pattern. Most beginners complete their first simple project successfully within 2-3 hours. The technique is straightforward: hammer pins, wrap string. That's it! Small mistakes blend into the overall design, making string art much more forgiving than many crafts.
What is the easiest string art for beginners?
A simple heart shape is the easiest starting project. It requires only 60-80 pins, uses basic wrapping techniques, and can be completed in 2-3 hours. Other easy beginner options include circles, stars, simple flowers, or basic geometric patterns. Avoid portraits and complex designs for your first 2-3 projects—stick with bold, simple shapes that have clear outlines.
How long does string art take for beginners?
A beginner's first simple project (like a heart with 70 pins) takes about 2-3 hours total: 30 minutes for board prep and hammering pins, plus 1.5-2 hours for stringing. More complex designs with 200+ pins can take 6-8 hours for beginners. Speed increases significantly with practice—by your third project, you'll work about twice as fast as your first attempt.
Can kids do string art?
Yes! String art is suitable for kids ages 10-12 and up with adult supervision for the hammering step. Younger children can help with the stringing part while adults handle hammering pins. String art teaches math concepts, improves fine motor skills, builds patience, and creates beautiful results kids can be proud of. It's an excellent STEM-friendly craft activity for families.
Do I need special tools for string art?
No special tools required! You need only a hammer, scissors, and pencil—things most people already own. The wood, nails, and string are the only items you might need to purchase, totaling $10-15 for your first project. There are no specialized or expensive tools needed, making string art one of the most accessible crafts for beginners on any budget.
What if I make mistakes in my first string art project?
Mistakes are normal and usually unnoticeable in the final piece! String art is incredibly forgiving—the overlapping lines hide small errors. If you connect wrong pins, simply unwind back to the mistake or continue forward. One or two wrong connections won't ruin your project. If you hammer a pin in the wrong spot, use pliers to remove it and try again. The beauty of string art is that "imperfect" pieces still look beautiful and handmade.
Should I use a pattern or design my own for my first project?
Definitely use a pattern for your first few projects! Creating your own design requires understanding line sequences and density—skills you'll develop after completing 3-4 guided projects. Using a pattern (especially from our String Art Generator) eliminates guesswork and guarantees good results on your first try. Once you understand how string art works, you can start experimenting with your own designs.
Conclusion
Congratulations on taking the first step into the wonderful world of string art for beginners! You now have everything you need to create your first beautiful heart project—from the supplies checklist to detailed step-by-step instructions and troubleshooting tips.
Remember, every expert was once a beginner. Your first project doesn't need to be perfect—it just needs to be completed. The skills you develop while wrapping those first 500 lines will serve you throughout your string art journey. Each pin you hammer and every string you wrap builds your confidence and ability.
String art is a uniquely satisfying craft because you can literally watch your image emerge line by line. That moment when your design suddenly "clicks" into visibility is pure magic, and it happens on every single project, no matter how experienced you become. It never gets old!
Start with that simple heart, take your time, and don't stress about perfection. In just a few hours, you'll have a beautiful handmade piece that you created entirely from basic materials and your own patience. That's something to be genuinely proud of.
Ready to Create Your First String Art?
Skip the guesswork and start with a perfect pattern. Our generator creates beginner-friendly designs with exact pin positions and easy-to-follow sequences.
Get Your Free Pattern →Next Steps in Your Journey
After completing your heart project, explore our complete string art tutorial for more advanced techniques, or read about the fascinating history and theory behind string art. When you're ready for your second project, the String Art Generator has thousands of possibilities waiting for you!